 The joke was kind of on me, though, in that it took me longer to cut and sew this (and the scarf I then decided I needed to make) than it would've taken to knit something. Aw, who cares? I made a new friend!
Pattern: Martha Stewart fleece hat. Pattern can be found here.
Fabric: Two colors of polar fleece. I bought 1/2 yard of each color, and that was enough for this child's size hat, the scarf below, and probably a whole other hat.
Crazy important thread tip: Use heavy-duty thread on the top only, and regular thread in the bobbin. Martha won't tell you to do that. But the very nice and helpful lady at the fabric store will. "If you use the heavy-duty on both," she said, "you're going to have a big mess." I used Gutermann 100% Polyester thread in color 257 - dark blue, and was grateful every step of the non-mess way for that nice lady.
Sewing needle: Size 18 for heavy-duty fabrics. The bulk of the fleece -- despite it being quite light and fluffy -- requires some heavy-duty tools apparently.
Mods:
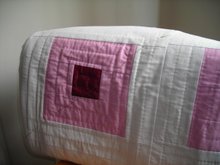
(1) I embroidered a snowflake on it. I used 3 strands of DMC embroidery floss in light blue and free-handed it. It's just some backstitching and french knots.
(2) Instead of seaming the hat so that the front is 2 panels of color next to each other, I sewed it so that the light blue panels wrap around the sides, like this:
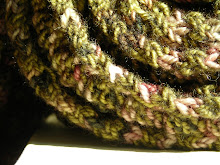
 Then I figured that a hat alone might be a lame present, and I had lots of leftover fleece. So I made a matching scarf. (It looks quite grey in the photo, but it's the same fabric. It matches in real life.)
 For what it's worth, here's the info on sewing the scarf:
Two-toned scarf "pattern": my own.
Specs: Finished scarf measures approx. 42 inches x 5 inches.
If I were really adept at this sewing thing, I could've done this very quickly, cutting two long strips (each one measuring 42.5" x 5.5") then sewing them together. I am not, however, adept at this sewing thing, so I pieced the strips. Whatever.
All you should know is: embroider the snowflake first, then sew the scarf -- right sides together-- leaving about a 3-inch opening on one side to turn it right-side out again. Again, I used heavy-duty thread in the top only, and regular thread in the bobbin. No problems there!
After turning the scarf right-side out, I blind-stitched the opening closed. I knew the next step would be to top-stitch around the scarf about 1/4" away from the edge, but I just couldn't bring myself to do it. I was so sleepy.
All in all, I'd say it was a pretty successful experiment. Not as speedy as it could've been (or as it would be for you, probably), but good nonetheless.
Now. Let the gift-wrapping commence!


6 comments:
Love the scarf and the hat! Was it worth the pain and suffering? :)
Very cute. I'm sure your niece will love it. Merry Christmas, Dr. B!
They both look very nice and professional. :)
Felicia - It was worth the effort. So much so that I just whipped up another one really quickly for my wasband (who had no qualms saying, "Make me one!" when he saw this hat). The second one went so much more quickly than the first.
And thank you Kim and Rachel for your very nice comments!
This goes on the list of quick gifts now for sure!
Great hat & scarf. The freehand embroidery gets extra applause.
Happy, safe Holidays to you!
those look so cozy!!!!!!
Post a Comment